From the moment Carla Hall appeared on Bravo’s Top Chef in 2008, it was clear that she was a winner—whether or not she actually took home the cooking competition’s top prize. With her Southern-influenced culinary chops, irresistibly sunny personality, and even a catchphrase (“Hootie Hoo!”), Hall quickly became a fan favorite—and in short order, a television star in her own right, as co-host of The Chew, which aired on ABC from 2011 to 2018. Last year, she released her acclaimed cookbook, Carla Hall’s Soul Food, which explored the kinds of dishes she ate as a child in Nashville. These days, Hall can be seen hosting Food Network specials and making appearances on ABC’s Strahan, Sara, and Keke.

Photo: JAcqueline Stofsick
Carla Hall in the G&G office.
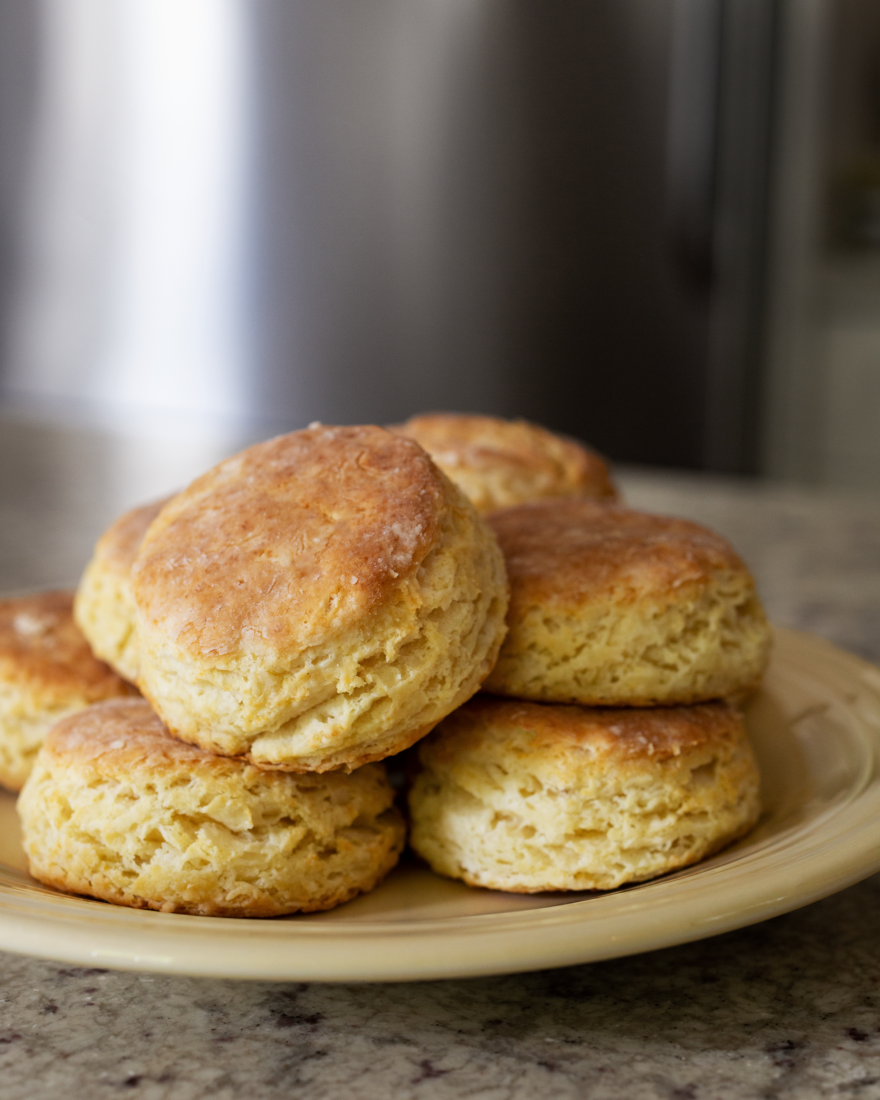
She’s spent much of this year traveling the country, hosting book signings and “Biscuit Time” cooking demonstrations (check here for upcoming events). “I wanted to show people how they could make biscuits if they don’t have years of experience,” Hall says. During the product-reviewing sessions this summer for Garden & Gun’s tenth annual Made in the South Awards, for which Hall served as the food-category judge, she kindly took time to show us how she bakes a batch, and dropped a lot of knowledge along the way. Follow along step-by-step in the video, and keep reading for Hall’s tips and recipe.
Eight Genius Biscuit-Baking Tips:
1. Instead of a sifter, Hall prefers a whisk to aerate the flour. Use a smaller cup or a spoon to pour the flour into the measuring cup, and then level the top with the back of a knife or a bench scraper. “The reason I do this is because I want to have exactly one cup—not a cup and a teaspoon,” Hall says. Do the same with measuring spoons of baking powder or soda.
2. Blend the buttermilk and lard or shortening together with an immersion blender. This mixes the fat into the liquid for even distribution throughout the batter. If you don’t have full-fat buttermilk, blend together whole milk and full-fat sour cream as a substitute.
3. Grate cold butter into the flour with a box grater to make uniform pieces of butter, and before grating, drop the entire stick together with the flour to coat it for a safer grip. “The reason you want cold butter is because butter has water in it,” Hall says. “When you keep it cold, the steam from the butter puffs up in the oven when it hits that high temperature. If your butter is soft, it will melt, and your biscuit won’t be tall and beautiful and delicious.” Then gently toss the butter into the flour with your hands and pinch the pieces to mix the proteins of the flour into the fat of the butter. “If your butter is sticking, [the bowl] needs to go back in the fridge,” Hall says.
4. Be flexible with the amount of liquid ingredients. “The reason I say about one-and-a-half cups is that if you’re in the South and it’s humid, your flour takes on humidity and moisture,” Hall says. Don’t pour all the liquid into the dry ingredients at once; pour half and stir, then add more a bit at a time as needed until the dough is tacky but not too wet.
5. Spray the work surface where you’ll roll the biscuits with cooking spray, and then dust it with flour. “The flour sticks to wherever I sprayed,” Hall says. “The reason I do this is because if I didn’t spray my surface, as soon as I put that wet dough down, it’s going to pick up all of that flour.” As you begin to shape the dough, make sure it is always moving and rolling without sticking. “I never use a rolling pin. I pat.” Hall pats the dough into a rectangle, then folds each third inward, like a book. Turn the dough 90 degrees, pat into a rectangle again, and repeat the folds. End with a ¾ inch tall rectangle.
6. For a crispy top and bottom, butter the sheet pan. “If you use parchment paper, you’re not going to get any browning,” Hall says.
7. When cutting the biscuits into rounds or, as Hall says, “punching out some biscuits,” don’t twist the cutter until after it passes all the way through the dough to the work surface, and then only lightly. Flip each biscuit so the top—the surface facing up—becomes the bottom. “That’s going to guarantee a least a quarter inch in height,” Hall says.
8. “Resist balling the scraps up,” Hall says. Instead, gather them and gently press together, then pat them flat with floured hands and cut again. Press the very last scraps together with your hands to make what Hall calls the “Granny biscuit.” “That was the biscuit I always wanted ’cause I knew Granny touched it more than any others.”